
Laview Camera Installation- Step-by-Step Guide!
Want to secure your home with a robust surveillance device, but unsure about how to do it? Don’t hassle! Just opt for the Laview Camera Installation, which is a straightforward process to bring you complete peace of mind. Moreover, the Laview security and surveillance cameras are widely accepted for commercial and non-commercial uses.
With their user-friendly interface, clear video and audio quality, and remote access features, home monitoring has been made easier than ever. In this guide, we will walk you through everything you need for the camera installation, from requirement gathering to How To Install Laview Security Camera step-by-step. So, let’s dive in!
What You’ll Need For the Laview Camera Installation?
To make the camera installation quick and easy, you must have some essentials beforehand. Having everything you need for installing your security device not only saves your time but also prevents unforeseen setup delays. Let’s have a look at what is required for the Laview Camera Installation:
- LaView Security Camera (fully charged)
- Stable wifi network
- Laview app
- Smartphone
- Sufficient power supply
- Mounting base and brackets
- Ethernet cable, etc.
Having all these items prepared will facilitate a seamless and smooth installation process of the Laview security camera.
How To Install Laview Security Camera Easily at Home?
Moreover, installing the Laview security camera efficiently is essential for optimal coverage and performance. To begin with the Laview Camera Installation, you must first select the type of mount for your camera. Then, follow these steps to physically mount your security camera at an optimal location for complete peace of mind.
- First, carefully remove the protective cover from the camera and take it out of the box.
- Now, unbox all the accessories and devices such as mounting brackets, screws, power cables, etc.
- Then, choose a suitable mounting location with a clear view.
- It is always better to place the camera at least 7-9 feet off the ground.
- Then, mark the drill points with a pencil and drill the holes on the wall or ceiling.
- Next, drill the marked holes and insert the wall anchors to secure the bracket.
- Further, attach it with the screws and tighten them with the screwdriver.
- Hereon, attach the camera onto the mounting bracket and adjust its angle.
- Lock the screws into its place and hear the click.
- After that, plug the camera into a wall outlet with the provided adapter.
- Then, download the Laview app on your smartphone.
- Go to the wifi settings of your smartphone and connect to the home wifi network.
- Further, launch the app and log in to your account.
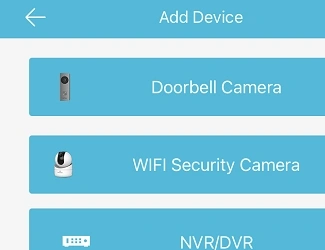
- From the camera dashboard, tap + or Add Device to add the camera.
- Now, choose a preferred wifi network to pair your camera.
- Then, follow the on-screen guidelines to complete this process.
- After that, you can customize motion detection, sensitivity, etc., settings.
- Finally, the camera installation process ends here.
Button Line
All in all, preparing and completing the Laview Camera Installation becomes stress-free if you follow the proper procedure. This guide has provided you with the correct camera installation and setup instructions. By following the steps mentioned in this quick guide, you can ensure your property stays protected 24/7.